When your designs become more complex, they become more difficult to test. This holds true in electronics, software, mechanical engineering, and in many other areas. In PCB design, design for testability methods can help you identify problems before you move to full-scale production. While the cost of testing a completed board can comprise as much as 30% of the total production cost, this can increase yields and ensure product quality.
Which applications are prime candidates for design for testability? First, boards with small component count would be a target for design for testability basics. More advanced designs with precisely controlled impedance and unique interconnect designs can also benefit from a test coupon. While the upfront costs can be considerable, the return on investment is considerable and is proportional to volume and product complexity. If you implement some simple design for testability steps, you can ensure your next board will operate as intended.
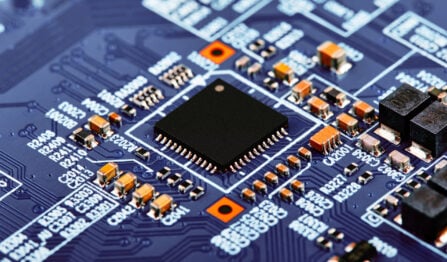
Design for Testability Basics: Test Points and Test Structures
Successful design for testing requires designating important test points in your PCB design files, which will then be used by your CM for a variety of tests. Test points are used to pinpoint specific circuit blocks and components you need to evaluate, as well as to designate the electrical functionality you expect from your design.
For high-speed/high-frequency designs, where signal integrity and power integrity problems are a primary concern, there are standard test structures you can place in your board. These test points and test structures will be used in subsequent bare-board and circuit tests to evaluate functionality and signal integrity.
Test points and test structures are normally designated in your schematic as no-BOM components. They can then be placed in your layout using your CAD tools. Most PCB CAD software will allow you to designate a via or a pad on a component as a test point. Alternatively, you can define a test point as a custom-designed pad in your layout. These are usually circular pads with 25 mil to 40 mil diameter. The same idea applies to test structures, although these structures have very specific geometries that are designed for evaluating specific aspects of signal integrity.
For advanced designs that require precise impedance control, it is infeasible to test interconnect impedance and signal attenuation in an assembled board unless you’ve designed your board for a boundary scan (JTAG). If you’re unsure of your designed interconnect impedance, you might consider producing a test coupon and requesting impedance measurements before finishing your layout and selecting test points or test structures. This is a low-cost pre-layout solution that helps you perfect your design before moving to manufacturing.
Pre and Post-Assembly Testing Methodology
 Testing methodologies are performed in two phases: before assembly (bare-board test) and after assembly (in-circuit test, or ICT). A complete bare-board test comprises the following tasks:
- Isolation testing. This involves measuring the resistance between electrical connections.
- Continuity testing. This involves checking for the presence and absence of open-circuits, which is effectively a variation on isolation testing.
- Short circuit testing. This involves checking for the presence of any unintended electrical connections due to a manufacturing error or design error.
Bare-board tests are generated from a netlist, which is generated from your design data. If you send your design data to your CM in the ODB++ data format, the design files will include a netlist. If you are still using Gerber files, the CAM department will generate a netlist directly from the Gerber files and schematic, which is then used for bare board tests. Flying probe or bed of nails tests can be used in bare-board testing, which reduces testing time for your PCB.
An ICT is performed after the board is assembled and will help isolate shorts, open circuits, and defective components. Rather than doing this manually, a flying probe or bed of nails ICT will provide automated testing and increase your test coverage. These types of tests will verify connections in the schematic and netlist match the real connections in your PCBA. The cost of these automated ICT tests is fairly low and can verify interconnect functionality.
Functional Testing
A related test methodology is functional testing, where the electrical functionality is measured while the board operates. This is where your CM will make copious use of test points and test structures to confirm interface connector integrity, connectivity, timing, and overall board performance.
The functional testing requirements for your board can usually be determined during a design review, but there may be specific aspects of your board that require deeper testing. You can ensure your performance requirements and tolerances are clear by placing annotations in your schematics.
If your board needs to interface with another system or has other special requirements, your CM may need to use various test fixtures, some data acquisition and processing in LabVIEW, or an upper-assembly test environment you provide. The combination of ICT and functional testing drives higher yields, provides more reliable information for troubleshooting, and ensures reliability over the product’s lifecycle. A JTAG test, automated ICT test, X-ray laminography, and visual inspections will provide the most comprehensive test coverage.
At VSE, we utilize design for testability basics and the same sophisticated test methods as high-volume CMs. If you’re designing advanced boards, like high-speed/high-frequency backplanes, SerDes channels, or heavy interconnect PCBA designs, VSE’s proprietary test methodology is ideal for evaluating board functionality. This proprietary methodology uses your design software’s netlist format or the IPC-D-356 netlist format. Minimal software development time is needed and testing is tied directly to your schematic.