Like any manufactured product, electronic devices can vary wildly depending on the complexity of the design and build quality. However, the varying design elements of a board can vastly alter the manufacturing processes, resulting in significantly higher costs than a “standard” board production. While talking to a manufacturer directly to get a custom quote for your board is worthwhile, and the most accurate method for pricing, understanding the basics of PCB manufacturing cost breakdown can help steer electronics development during the early design stages to align costs with the budget.
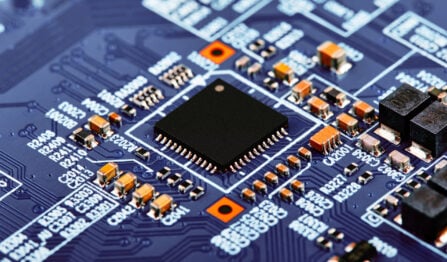
PCB Manufacturing Cost Breakdown: Where Does the Money Go?
It’s critical to underline that while PCB manufacturing can incur significant costs, a new design (i.e., an NPI) incurs most of its expenses during design planning by a considerable margin. These steps include:
- Idea/proof-of-concept build – determines the size of a single unit, function, and features.
- Electrical engineer simulation/testing/design – solidifies design, builds toward component procurement, weighs in on physical aspects of the board like surface finish and thickness
- CAD layout – arranges electrical and mechanical data optimally to improve panelization (always remember: fabrication/assembly services are by panel).
- Mechanical engineer design/input – improves enclosure/thermal efficiency for the best service life and system integration.
As such, design teams must refrain from investing significant time, energy, and resources into product development only to balk at quality fabrication and assembly costs.
Manufacturers often describe costs in terms of hard and soft:
- Hard costs are directly related to manufacturing materials and processes.
- Soft costs are indirect elements resulting from design ambiguity.
| Common Hard and Soft Costs | |
|---|---|
| Hard | Soft |
|
|
How Do Board Attributes Affect PCB Cost?
Board Size/Panelization
Simply put, the larger the board, the greater the material costs. Cost correlates linearly with area increase (once again, fabricators charge by panel), but this can jump when dealing with extremely large boards. Panelization is also essential: depending on the orientation of the board extent within the panel, manufacturers may be able to squeeze additional boards from a single panel, greatly reducing per-board costs. Sometimes, this will be a back-and-forth process with the design team to condense the layout for significant savings slightly.

Layer Count
The simplest board is single-sided, which may be enough for some designs. This layout reduces most board processing steps to a single pass on the populated side of the board. Next, a double-sided board doesn’t require additional laminate material. Still, additional passes may be necessary for certain procedures (e.g., passing the solder wave over the board top and bottom assembly). By adding and fusing additional laminates during lamination, designers access additional layers for signal routing or power/ground planes. Additional layers increase board costs nonlinearly due to additional materials and processing; extremely high layer counts are more prone to failure and reliability concerns. The most common stackup is a 4-layer board due to its balance of cost and board space.
Build/Complexity
Signals need a conductive path between layers for multi-layer boards (except for possibly double-sided boards). Fabricators drill and plate vias and other holes of varying depths, the simplest being the through-hole. However, dense designs may require depth-drilled holes to utilize smaller holes and maximize layout space: the more drill-plate-lamination cycles, the more expensive the fabrication.
Copper Thickness
Most boards can rely on 1 oz. copper/sq. ft. to sufficiently handle operations, but high-current boards may require additional foil. The thicker the copper, the greater the price, but there’s an extra “hidden” cost as thicker copper is more complicated to control during the etching process. The etchant can undercut the trace or other copper features, affecting reliability or impedance. Thicker copper costs also increase with higher board layer counts.
 Holes
Holes
 Holes
HolesDrill bits are consumables that manufacturers must replace periodically depending on their wear speed. Numerous drilled holes will take additional processing time for the manufacturer, and smaller holes pose additional challenges. Smaller holes will use shorter drill bits that reduce the number of simultaneous drilled boards in the process.
Underspecification and Overspecification
It’s far more common to receive design information that lacks the necessary information for manufacturing. When dealing with missing information, the manufacturer has two options: push back to the design team for clarity or assume the designers left the decision up to the manufacturer. Both options can significantly slow manufacturer turnaround time. Similarly, overspecifying the design can cause a loss of cost efficiency and lead to interpretation issues without a more direct way to communicate design intent.
Reliability
Some electronics cannot experience failure/downtime during operation without endangering their users (e.g., aerospace, medical, etc.) For these electronics, more intricate fabrication and assembly methods combined with special materials and processes will ensure the board features meet the reliability requirements of the application. High-reliability manufacturing (AKA Class 3 electronics) is prohibitively expensive and unnecessary for general electronics.
Your Contract Manufacturer Delivers Quality and Excellence
A PCB manufacturing cost breakdown is an excellent method for ballparking a design’s total and per-board costs, but direct communication with a manufacturer can provide further insight into your board’s specifics. Here at VSE, we’re ready to quote and meet your design’s custom requirements. Our engineering team has ample experience and understands the nuances of PCB manufacturing. We’ve been realizing life-changing and life-saving electronic devices for over forty years with our valued manufacturing partners.