Sometimes taking things apart is the quickest way to learn how they operate. If someone has the right tools, taking something apart discovers its inner workings, although reassembly may not guarantee it. When I’ve had to learn more about bike repair or equipment, I’ve taken the slow and sometimes arduous task of dismantling the bike down to the frame. By carefully tracking every piece I remove to retrace my steps later, I remember more than I would have by passively viewing someone else’s work.
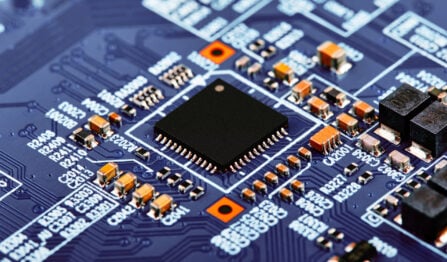
Deconstructing to learn more about a device is nothing new nor unique to PCB design. It is a critical last line of defense to recover lost or incomplete data to resume manufacturing. Because of their dense, planar structure, PCB reverse engineering must utilize several approaches to accurately retrieve and recreate a design.
Comparison of PCB Reverse Engineering Steps |
||||
|---|---|---|---|---|
| Summary | Cost | Complexity | Timeframe | |
| Solder mask removal | Abrasion to remove the solder mask and prepare the board for further destructive analysis. | Minor | Leans difficult | A few hours |
| Delayering | Selective removal of layers to reveal buried layout design. | Moderate | Leans difficult | A few hours |
| Imaging | Offers an internal view of obscured features that can create 3D imaging and serve as records. | Major | Leans simple | Many hours depending on the image count |
PCB Reverse Engineering Starts with Observation
The motivation for PCB reverse engineering is not necessarily nefarious. Companies that possess products or completed designs through business acquisitions often require the service. Documentation may be poor or missing, but since the board is the amalgamation of all the design files, a careful inspection can peel back the layers (sometimes figuratively) to recreate designs as they were and potentially prepare for new revisions. This practice is rarely a single shot but instead mirrors the prototype process, perhaps unsurprisingly, in reverse.
The first step for reverse engineering is determining the data acquisition method at the heart of the process. There are two distinct methods of data regeneration depending on the end goal:
- Block diagram/BOM – An abstract structure of the board data that reveals the high-level associations between circuits. The general purpose is to understand function as opposed to exact operation.
- Cloning – Engineers use cloning to recreate a design for exact (or reasonably close) emulation. This method of harvesting data from the PCB is more involved and likely requires several passes to nail down precise details.
The two modes can combine to form a more cohesive approach to reverse engineering; by starting with the circuit blocking, designers can gain a helpful “lay of the land” before diving deeper into the minutiae. An excellent first step is to assuage how much usable information is available solely through visual inspection, such as reference designators and package styles. Manufacturers’ part numbers (MPN) or any other identifying markers visible on the components themselves also provide an avenue for further research with the assistance of online part databases.
Only some components may have their designator shown or legible, and significantly elapsed time may degrade the silkscreen to the point of loss or illegibility. However, the most important parts should have their designators visible. A few probes and oscilloscope measurements can go a long way to establishing passive values for unremarkable components with hidden reference designators.
With a component list cobbled together, the next step is to reproduce the artwork. A low-cost and non-destructive option is high-resolution photography imported into image editing software. Designers will then make visual mockups of the routing and assign them to different graphic layers to track continuity. As this procedure, in part, relies on bottom-side illumination to see internal layer design, it is less applicable to boards with even moderate layer counts; anything above four will likely be a severe limitation. It’s possible to improve transparency to the inner layers through the disassembly of the board, but document the assembly before desoldering for records.
More sophisticated imaging options like X-ray imaging are also available to contract manufacturers (CM). The process usually assesses the quality of solder joints formed during assembly, but here, it’s used as an investigative tool to determine the obscured layout of the board. Its usage has some drawbacks, primarily that X-rays will produce a composite 2D image of the internal layout. However, computerized tomography can build out 3D images to better distinguish features.
How to Handle PCB Deconstruction
Controlled delamination can reveal the inner layers that would otherwise be impenetrable for boards with numerous layers. Creating the board involves fusing the etched layers of copper attached to the substrate, forming a more familiar board structure. Normally, delamination of the board is a wear condition that can severely undermine service life through exposure to moisture and contaminants in the environment. In this instance, it’s the fundamental tool to deconstruct the board while carefully preserving its design.
There are many options available with a similar plethora of relevant tools and equipment ranging from common availability to high-precision:
- Abrasives – An effective and low-cost method that uses sandpaper, rubbing stones, scratch brushes, and sandblasting to remove the solder mask layer. Engineers can switch between different grits depending on the surface finish, and manual removal uses even motion to preserve planarity and avoid damaging underlying copper.
- Solvents – A chemical solution attacks the solder mask while preserving the substrate and copper, followed by a light brushing. While dissolving the solder mask is safer for operators and straightforward, responsible disposal of the chemicals is mandatory.
- Laser – Ablation is a high-accuracy mechanism for solder mask removal; the width of the beam makes the process much more time intensive than abrasives or solvents but also allows for improved targeting. In addition to being cost-prohibitive, substrate materials react differently to ablation, and there is less ability to tailor the process.
The board is now ready for delayering, a secondary abrasion step that removes outer layers sequentially. Process control must walk a fine line to gradually and evenly remove these layers without damaging the buried layers. Milling, rotary drilling, and surface grinding can all accomplish this goal, but materials may be more or less suitable for a particular option.
Your CM Has the Tools and Knowledge for Bidirectional Engineering
PCB reverse engineering breaks down designs and gives engineers the tools to build them back up with new design criteria, components, or other general improvements. Reverse engineering is invaluable where documentation is lacking, providing a pathway to a restored design that retains all of the dense information held within the design. Combining destructive and non-destructive techniques gives designers everything they need for a new revision, this time with better file management.
At VSE, we’re a team of engineers committed to building (or rebuilding) electronics for our customers, and forty years of experience has given us the expertise and reputation for all manner of PCB engineering. Together with our valued manufacturing partners, we deliver the highest reliability with an unparalleled approach to quality.