The Dunning-Kruger effect (informally known as “you don’t know what you don’t know”) is a powerful bias. I came from a physics and electronics lab background before working on PCB layout, and I thought my knowledge of electromagnetic theory would make layout trivial–I quickly learned how wrong I was. The average person is familiar with the work of a PCB contract manufacturer who assembles electronic components for a circuit board, albeit unknowingly. But even those familiar with electronics may not realize that circuit board production requires intricate fabrication before assembly. Fabricators use lamination and PCB etching to create the raw circuit board, also known as the bare board, before populating it with the components that provide the circuit functionality.
Common PCB Etching Defects (And How to Avoid Them)
| Defect categorization | Description |
| Unetched/under-etched copper | It may not require correction if no shorts result from the remaining copper. Increase the reaction rate by agitation or adjusting the concentration of the etchant solution. |
| Pits | Pits are areas of copper voids erroneously etched away, usually due to poor photoresist coverage. Review the photoresist process to ensure complete coverage. |
| Undercut | Excessively thin traces on thick copper laminates will likely result in an overaggressive etch of the sides of the traces as the etchant works its way down to the substrate. For proper DFM, consult a manufacturer on the lower limit of trace width producibility. |
.
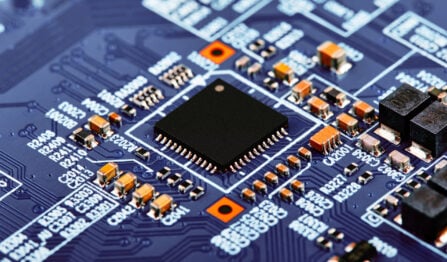
Setting Up for PCB Fabrication
![]()
In printed circuit board manufacturing, a PCB CM will typically choose a fabricator and send the files to them based on the board’s needs. Once the fabricator has completed their design review to verify the manufacturability of the board, they transfer the circuitry images onto the board materials. For internal layers, this involves coating photoresist onto sheets of copper pre-bonded to core materials made from epoxy resin and glass fiber, commonly known as FR-4. The circuitry images are then exposed to the photoresist with an ultraviolet light through photo tooling or directly imaged with a laser.
The results will be the same whether the fabricator uses ultraviolet light or a laser to expose the photoresist. The photoresist will harden or polymerize where the circuitry images are exposed, forming a protective coating over the copper. All other areas of photoresist that were not exposed will remain pliable and undergo chemical cleaning before etching.
What is Etching?
Through immersion in a chemical solution, etchants remove copper from a circuit board layer unprotected by the hardened photoresist. The etching used by industrial circuit board fabricators diverges into acidic and alkaline processes.
Acidic Etching
Acidic etching removes copper from internal layers in standard rigid FR-4 circuit boards due to its precision and less aggressive action. The acidic process won’t react with the photoresist and will produce less of an undercut in the metal it etches. The trade-off, however, is that acidic etching will take longer than other methods.
Alkaline Etching
Alkaline etching attacks the outer layers of the circuit board, where a quicker process is needed to maintain the uniformity of the remaining copper. Alkaline is more active than acidic and requires careful monitoring to ensure its accuracy.
The acidic and alkaline etching processes are ideal because they have a high etching rate at a relatively low operational cost and effectively etch many different metal materials. PCB fabricators must precisely maintain their etching processes to guard against exposure to hazardous liquids and fumes and prevent any chance of water contamination.
The PCB Etching Processes to Fabricate the Board
With the hardened photoresist on the copper of the inner board layers protecting the traces, vias, and other areas of metal circuitry, the remaining photoresist is cleaned off, revealing bare copper. The layers are then etched to remove unprotected bare copper, leaving only the desired circuitry. After removing the hardened photoresist, the inner layers contain only their copper circuitry. This step is repeated for each pair of inner layers until all board layers are complete.
The next step is to laminate the inner layers with sheets of fiberglass impregnated with epoxy resin, known as “prepreg.” After covering the top and bottom of the board with a thin layer of copper foil, the board is ready to be laminated with heat and pressure. Then, following lamination, the thru-holes in the board are drilled, and it’s ready for the next etching process.
First, the top and bottom surfaces of the board will be covered with photoresist material, just as the inner layers were for imaging. Then, ultraviolet light or a laser will expose the reverse image of the photoresist. All the photoresists will harden for these surface layers except for the metal circuitry patterns. Once those circuitry areas have their pliable photoresist coating washed off, the thin layer of copper foil underneath is exposed.
Now, the exposed copper circuitry on the surface layers of the board will be electroplated with a thick layer of copper, building up the thin copper foil. After copper plating, the circuitry is plated again with a layer of tin to protect the copper during the final etching process. Cleaning removes the hardened photoresist on the rest of the board surface, and the unprotected copper foil is etched away, leaving only the tin-protected copper circuitry. After removing the tin, the board is ready for its final processing. It’s important to note that etching is only one part of fabricating the board.
Ready for PCB Assembly
The raw circuit board is complete, but some final steps remain before transferring to assembly. Protective surface finishes require plating over the exposed copper with a solder mask application across the board’s surface. Silkscreen reference designators and other markings are necessary as well. The board will also undergo tests and inspections to ensure no electrical shorts between nets before being sent back to the PCB CM for component assembly.
It’s readily apparent that PCB fabrication consists of many precise processes to build each board per its requirements. The PCB etching process is applied differently depending on which portion of the board is under construction. Careful monitoring ensures the trace widths and spacings are within their specified tolerances. PCB CMs understand these needs and will choose the best fabrication partner. At VSE, we have a list of fabricators we work with based on their capabilities and experience to ensure that your board adheres to the highest levels of quality control for performance and reliability.